

I just won this picture from http://cieloazuljewelry.blogspot.com/
I SO love it...
I buy frames when in clearance or at the thrift store... I had frames but, they were too small or too big....SO, here is my secret to make a picture look amazing...With a frame too big.

The frame and mat do not fit too big...
I took my picture to the craft store. Chose 2 sheets of paper that i thought would match my interior and look good with the picture...

See the connection, i had to cut that and make it connect...


Here with the painters tape.....to show you that i connect it...It won't show...no worry...
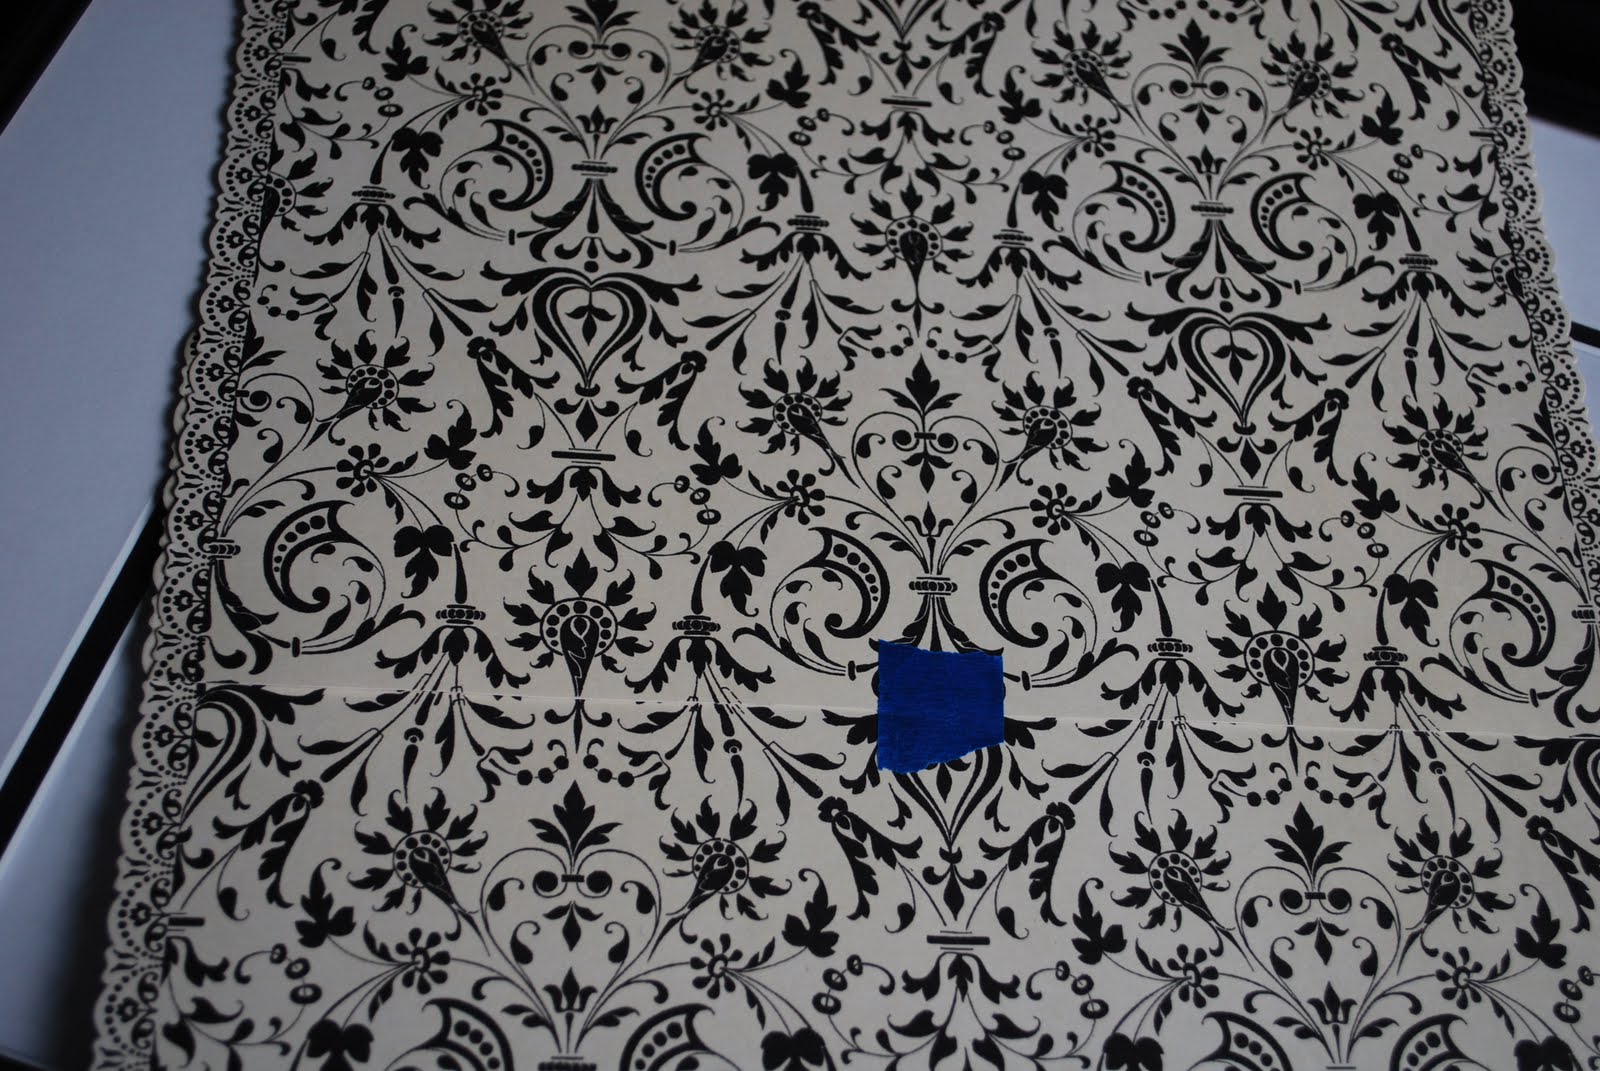
I taped it on the mat first...

Double side tape on picture...I placed it on top..

Closed it in frame...

PERFECT and so pretty!

Here some fun with wall paint color....to show you how the color on the walls can make a picture look so good!
I love white walls also....but i only place white on the wall if there is a design behind it...like shabby chic...

Red walls...........Valspar, Crimson in Satin finish.

Brown walls..........Valspar, Chestnut in Satin finish.

Sun flower walls...Olympic, Oakcast in Satin finish.

Green walls.....Valspar, Belle grove moss in Satin finish.

The brown in my kitchen....Olympic, Oyster Shell in Satin finish.
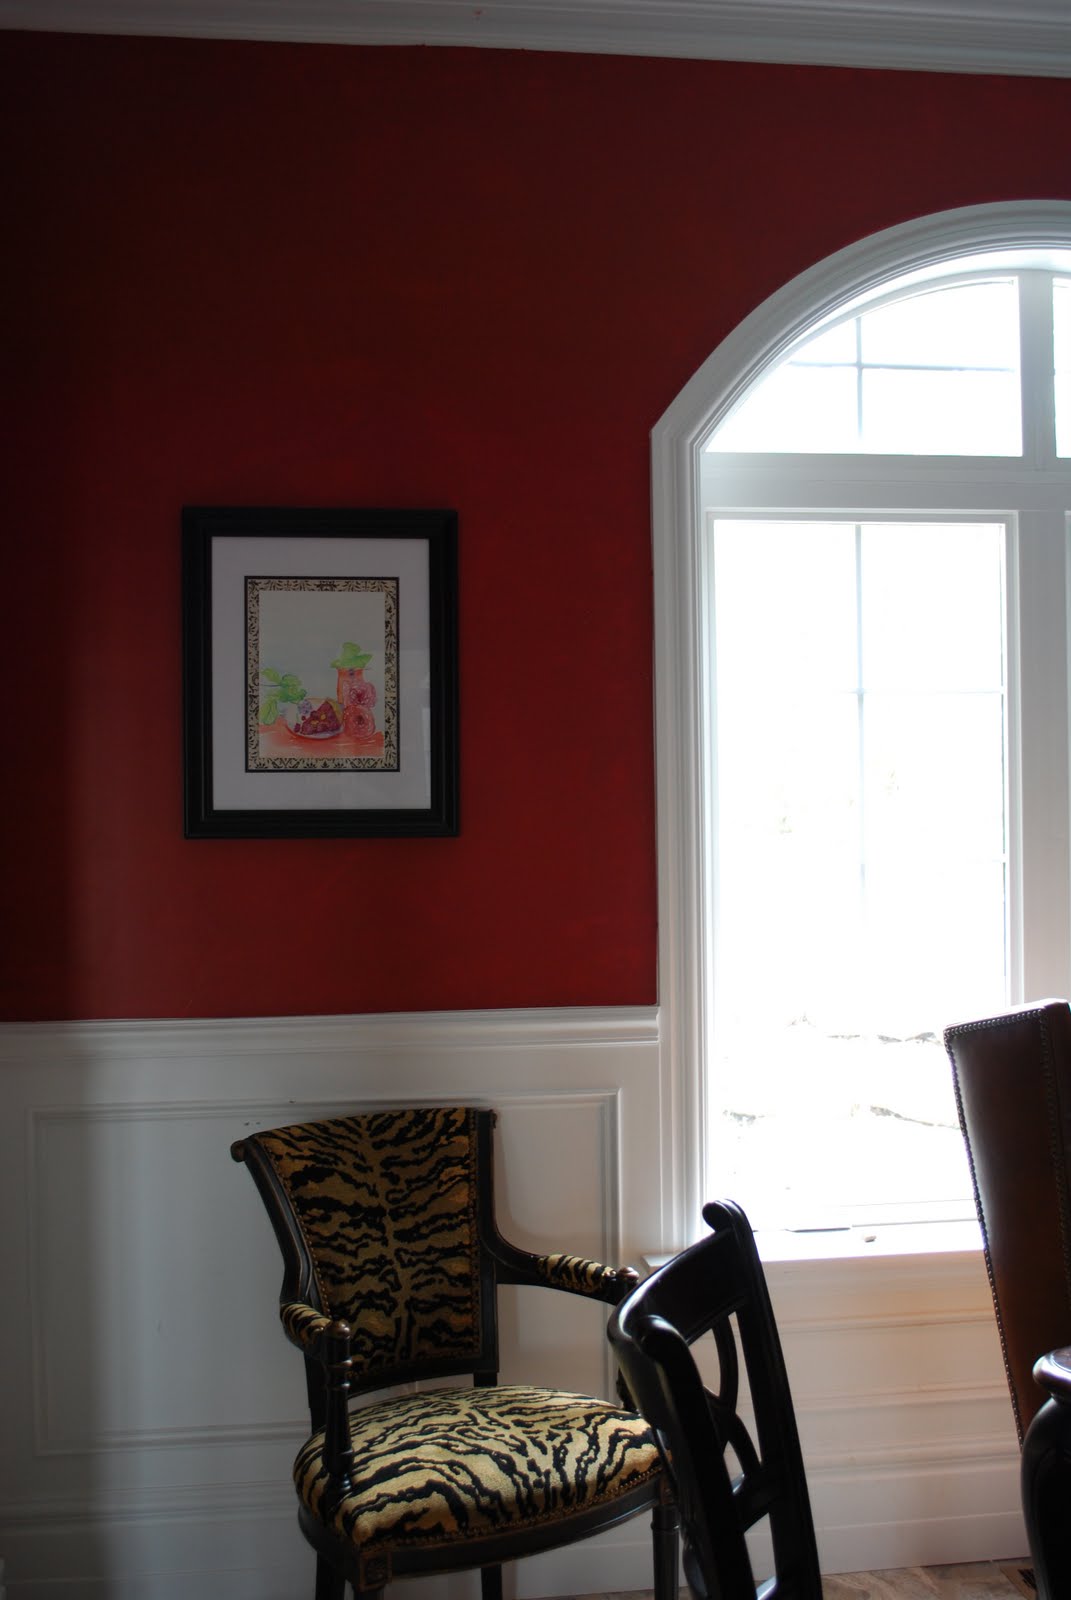
I chose my dining room....


Beautiful pictures and cards are available HERE
Great jewelry also!
She has a give away going on now!
She has a give away going on now!
Thank you Carol at
You are a wonderful artist.
I think a wall arrangement of Cielo paintings would look amazing...Hmmmmm
I know some of you are looking on Etsy to do just that....
Posts you might like:
Oh Frenchy! Carol painting is adorable, a true work of art! I just love her works, she's amazing!
ReplyDeleteThanks for the tutorial darling, it is very useful and you did a perfect, lovely job!
Hugs
Flaviana
Hi, thank you for your comment on my post. I love your blog too! I was in France yesterday, just across the border, to one of those french flea markets I love so much. There is too much to read on your blog for a one-time-visit, so I will certainly come back later this day.
ReplyDeleteBonne journée!
Natacha from Luxembourg.
PS: Did you know that the official language here is French?
What a wonderful painting !! good job !! thanks for tutorial.....it's good for me to learn something !! hahhahah!! have a nice sunny day.........hugs from Ria
ReplyDeleteLucky you winning that beautiful picture! I love how you framed it, what a clever trick! So happy it ended up on the red wall - it looks lovely there!
ReplyDeleteOlá Frenchy! Adorei seus quadros, são lindos! Obrigada por sua visita e pelo incentivo! Espero que eu consiga perder peso, assim como você consegiu! Você é linda! Beijos
ReplyDeleteThe picture you framed looks great with the background print you chose and is oh so perfect where you hung it.
ReplyDeleteThis comment has been removed by the author.
ReplyDeleteWow! I love your blog! I have to check out all the tutorials on the sidebar! I found your blog through the new friend friday hop and now I'm following :)
ReplyDeletehttp://inthehammockblog.blogspot.com
brilliant - and looks awesome!
ReplyDeleteI like it on the red but I also really liked how it looked on the green....
ReplyDeleteLove your creativity once again!!
ReplyDeleteThanks for sharing!! :-)
Great idea for framing! I also love your wall paint colors; my dining room has red colored walls very much like the red in one of your pictures.
ReplyDeleteGRACIAS FRENCHY!!!! I love that great trick, so clever=0) It looks great in your dining room. I just love the background paper you used. LOVELY job and thank you for posting about it, so sweet.
ReplyDeleteThank you dear friend,
xoxo,
Carol
Oh you are so good at these projects,thanks so much for sharing a great idea.
ReplyDeleteHugs
What a great painting! It's gorgeous. I never win anything lol so I'm definitely jealous, but congrats to you!
ReplyDeleteOn another note it was EXTREMELY difficult to find the "Post a comment" link. I nearly left because I couldn't locate it, so you might want to work on making it a little more visible for you readers. :)
How nice, she sure gave it to the right person! Look how nice you have cared for it and it looks great on the red wall too! :D
ReplyDeleteAmazing picture. It looks great everywhere in your house. And I love your idea. I always have that problem too. Now I know what to do. Thanks!
ReplyDeleteYour framing looks amazing and I am completely in love with the artwork. Simple, understated and most delightful.
ReplyDeleteDi
I like the classy picture holder in the green shirt!
ReplyDeleteNICE! And I just LOOOOOOOOOOVE your red wall! Amazing! I've always wanted to do that!
ReplyDeleteHi Frenchy,
ReplyDeleteIt looks like we are neighbors on Met Monday, so I popped in for a visit! I'm so glad it turned out to be you, because you always come up with such great ideas, just like the one you posted here! I love the paper you used, you are so clever!!
Hugs,
Karen
Oh, you are certainly the most smartest one! :) I love this and it seems like a pretty simple thing to do! Love it. It's amazing how the picture looks good on all of your pretty painted walls!
ReplyDeletebe a sweetie,
Shelia ;)
That looks so good I'm going to look for smaller pictures or bigger frames from now on. Thanks!
ReplyDeleteThat's a great idea, it looks like a custom double mat. All of your wall colors are so pretty.
ReplyDeleteYou clever girl you, this is a brilliant idea! I run into this problem all the time and you've given me a beautiful solution, thanks!
ReplyDeleteOh my this is pretty I like the color on the wall too. Happy Tuesday!
ReplyDeleteMYM~Asiatic Lily
That paper is FABULOUS! Nice to see you at Anything Related again! :)
ReplyDelete~Bridgette
So cute Frenchy, I love that idea!
ReplyDeleteI love this!! I've come across that same problem myself, photo not fitting any size premade matt and it's very expensive to have matts custom made. Thanks for linking this post to Woo Hoo! Wednesday.
ReplyDeleteThat is a great framing job! Beautiful picture!
ReplyDeleteLove that paper, I never would have thought of that, and I have plenty of paper to work with.
ReplyDeleteThe frame is the exclamation point on the painting and you have certainly provided that.
ReplyDeleteThis comment has been removed by a blog administrator.
ReplyDeleteLooks great. So glad you showed it up on the wall. We can see the total effect and how fabulous you really are. :)
ReplyDeletePam
The picture looks really good in that frame!
ReplyDeleteThose are some great tips. I love seeing the picture with all the different wall colors. each one brings out something different in the painting.
ReplyDeleteThank you for linking this up as well!
Great idea!
ReplyDeleteThanks for lining up!
Great idea!
ReplyDeleteThanks for linking up!
This was so pretty this project, and so versatile too. Thanks for linking up....I would appreciate my link on your post Frenchy:)
ReplyDeleteI am your newest follower 1001 yea I found you thru Debbiedoos. I love your picture, I am going to hope my next picture is to small because this is suh a great idea! If you get a chance hop on over and say hi www.thepolkadotcloset.blogspot.com
ReplyDeleteCarol
Debbie...I have your party under Sunday Parties links...on my right side bar and another...under blog friend's list on the bottom of my blog.
ReplyDeleteWhat a great job you did!! And it looks fantastic on your wall!!! I LOVE the color of your walls. Now that picture just would not look the same on a white wall, am I right??????
ReplyDeleteDebbie
You did a fantastic job framing that picture. It looks wonderful where you put it too! Great tip, I love it! Thanks!
ReplyDeleteThat turned out just lovely!
ReplyDeleteWhat a great idea, thank you for sharing!
ReplyDeleteHugz,
Kim
What an awesome! I always hesitate to buy pictures that aren't standard sizes because I don't want to pay for custom framing....this is a great solution!
ReplyDeleteThank you for linking up this week!
Hello...
ReplyDeleteI love your pretty art...it looks fabulous on those red walls! I have often used pretty scrapbooking papers for this very same thing! There are just so many really beautiful papers out there! This is a great idea and the perfect solution for pieces that may be too small for a mat or frame! Thank you so much for sharing this great tip with us for Sunday Favorites this week!!! Great post, my friend!
Warmest wishes,
Chari @Happy To Design
It looks good! Thanks for linking up for Friday Favorites!
ReplyDelete